This blog, 4 lightroom tips to speed up your workflow, is a guest blog from Mark, the photographer behind Gold Hat Photography and founder of Shotkit- the online community you can find gear reviews, photography tutorials, business advice, free tools, inspiration, and much, much more! Check it out here!
Whether you’re a professional, amateur, or just a smart phone photographer, it’s likely that you’ve come across an image editing software called Adobe Lightroom.
Despite confusing naming conventions (Lightroom, Lightroom Classic, Lightroom CC, Photoshop Lightroom…wth?!), it’s still the number one photo editing software of the year.
I’ve been a professional photographer for almost 10 years, and have used Lightroom to edit both my personal and client photos almost every day.
When Adobe moved Lightroom from being a one-off purchase to a subscription, it lost a lot of fans, but many photographers still believe its definitely a price worth paying!
Here are 4 tips that will help you speed up your Lightroom workflow.
-
Check your Export Settings
Here’s a tip that not many Lightroom users know about.
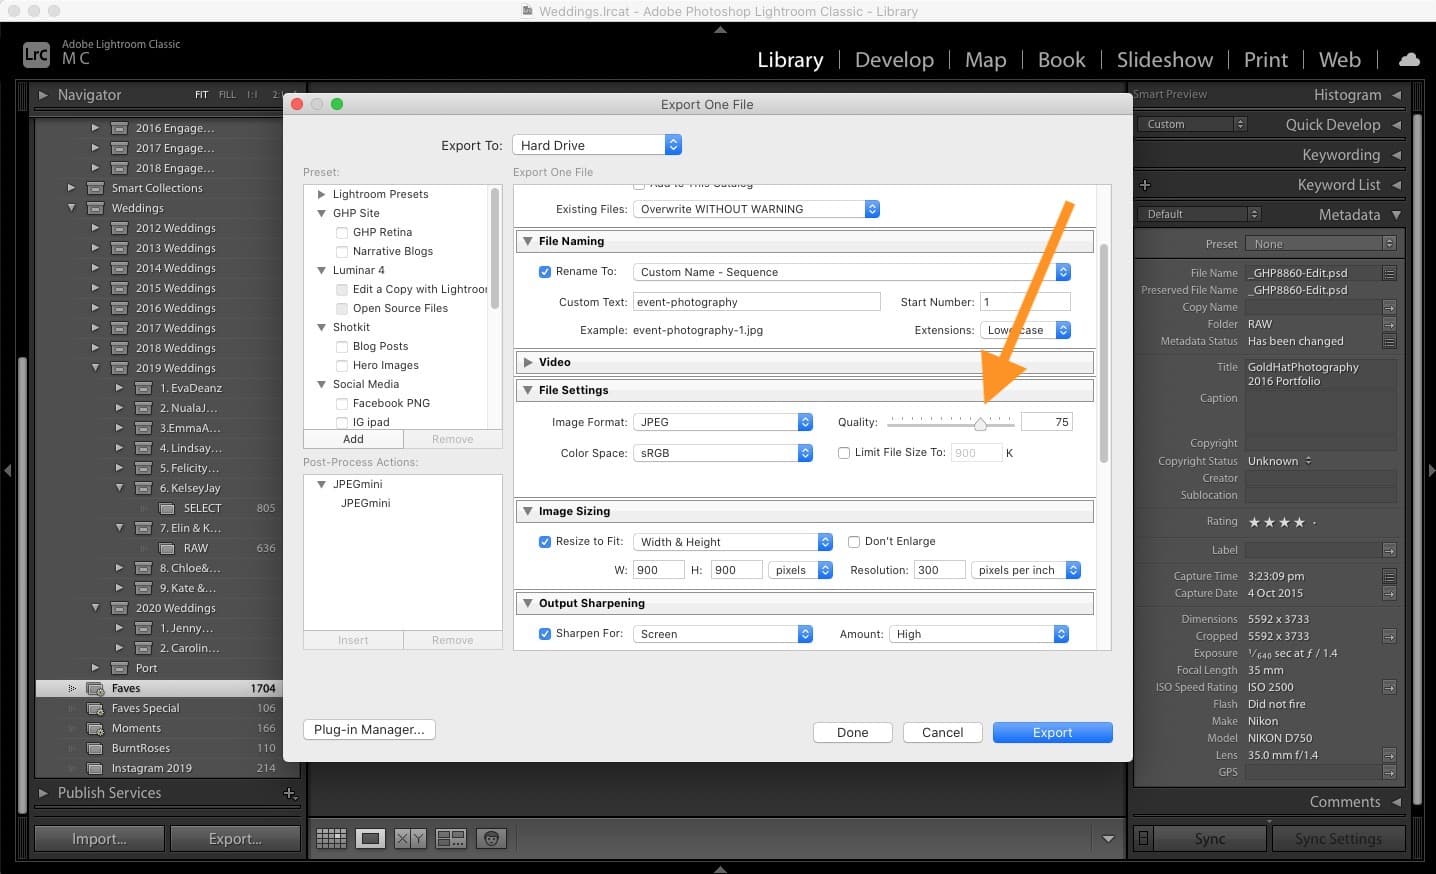
Most photographers export all their files from Lightroom at 100% quality. I mean, why wouldn’t you?
Well actually, by exporting at the Lightroom JPEG export quality of 75, you end up with a photo that looks identical to one exported at a quality of 100, but is about one third the size!
This fact is actually very well documented on the net.

-
Use Smart Previews
There are many tips to help speed up Lightroom, but I’ve not come across one that makes such a huge difference to the Develop module as using Smart Previews.
Many of you will be familiar with Smart Previews already and using them to manage your mobile workflow.
If you’ve been using them to edit files on the go whilst leaving the original RAW files on an external device, you’ll no doubt have noticed the massive speed difference when using Smart Previews.
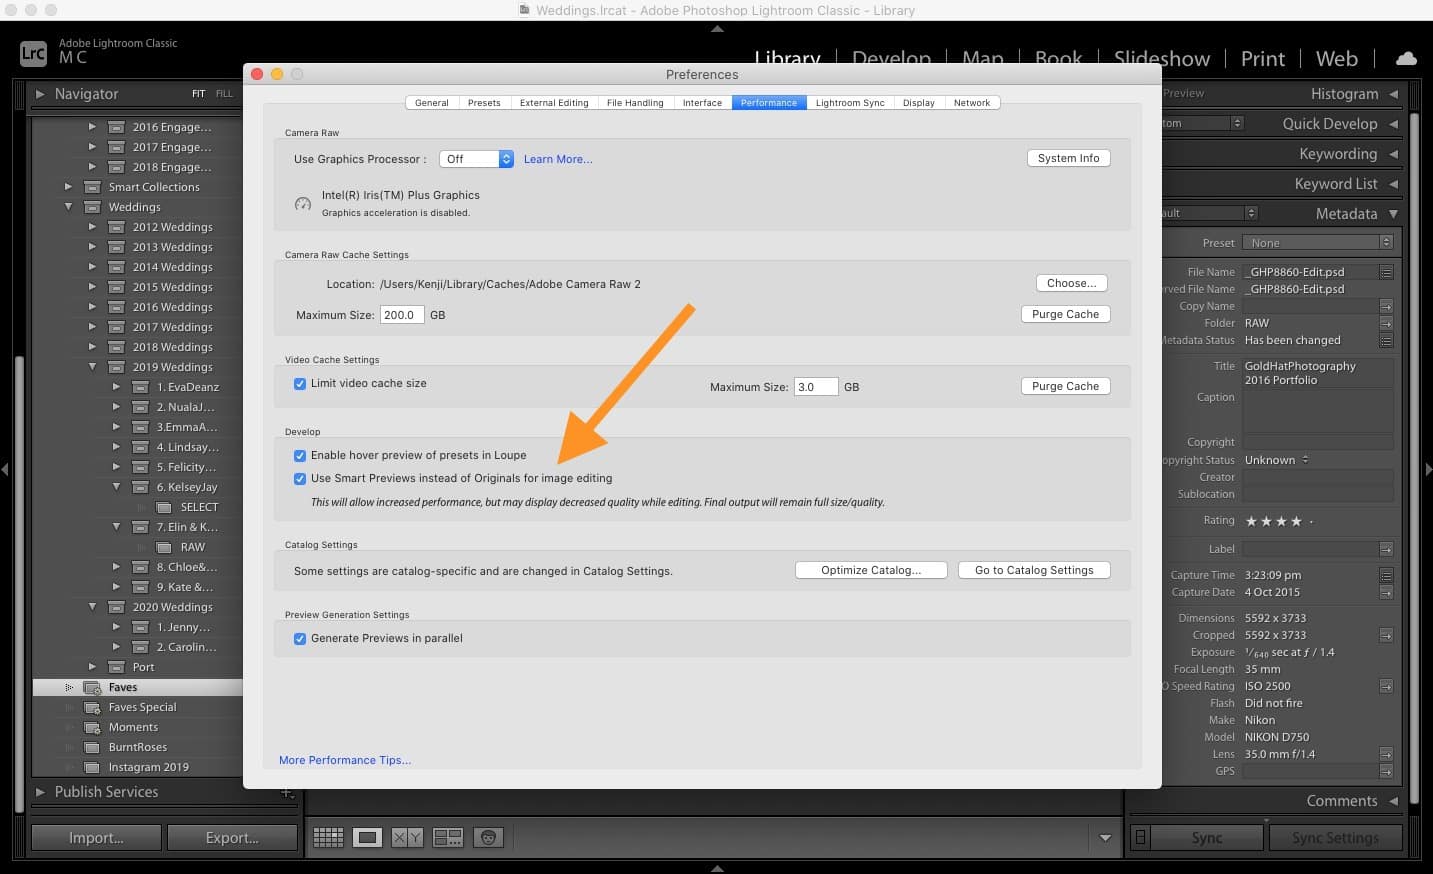
If you’d like to use Smart Previews all the time, navigate to the Performance Tab in Preferences, and turn on ‘Use Smart Previews instead of Originals for image editing’.
(This is assuming that you’ve already created the Smart Previews of your files of course.)
Editing using the Smart Previews is much faster, and so is any Develop module action.
Using this tip alone should speed up your Lightroom workflow by more than 50%.

-
Maximize your Display
Here’s a quick tip that will help those of you who edit on the sofa using a laptop in front of Netflix! (Only me?!)
Trying to edit photos on a small laptop screen isn’t fun, but more and more of us seem to be doing it.
Whether you have a 13”, 15” or 17” laptop screen, you can always use more of your screen’s real estate to display the active image.
You may already know the useful ‘Tab’ shortcut, whereby each time you click the Tab button on your keyboard, your editing panels appear and disappear to give your active image more room.
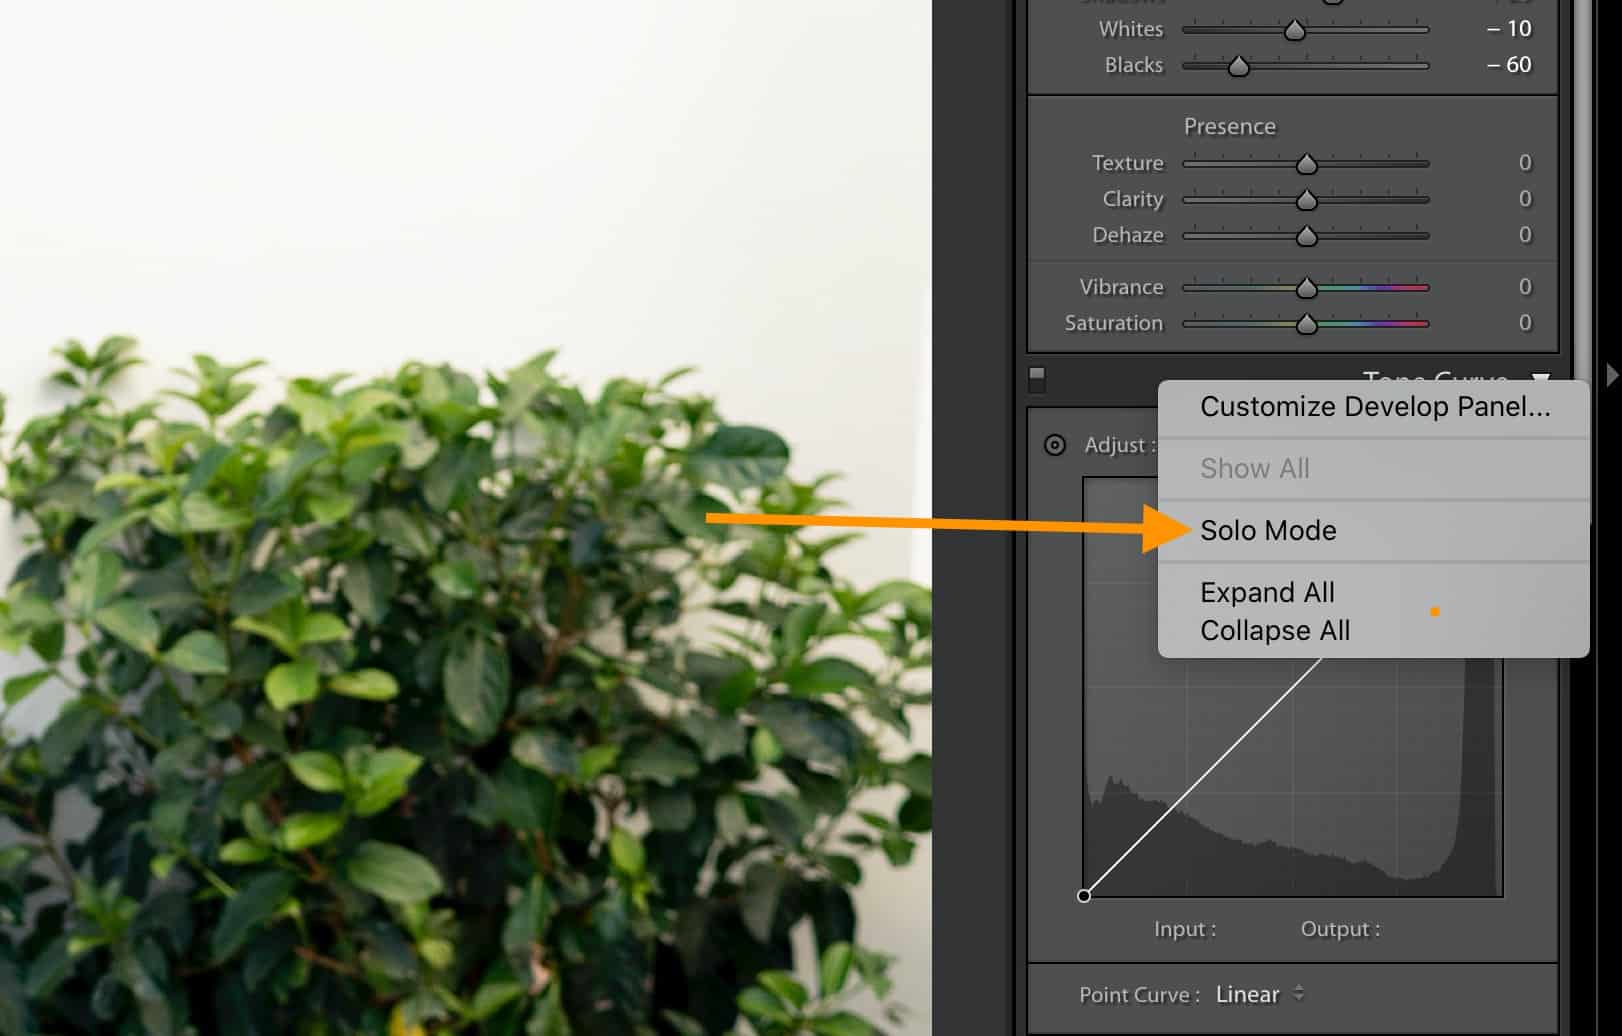
There’s also a neat trick that’s hidden away which will tidy up your side panels when they’re not in use, and then expand only on the tool that you’re using.
To do this, simply right click on any of the tool panel titles on the right of your screen, and select ‘Solo Mode’.
This will save you lots of time spent scrolling up and down and clicking to open and close tool panels.

4. Create Shortcuts to your Catalogs
If you’re following Lightroom speed best practices and creating new catalogs each year, you’ve probably got a few different catalogs by now.
Catalogs are Lightroom’s annoying way of organising files – unlike other photo editors which simply reference files from their existing location, Lightroom forces you to copy or move them into a catalog.
On a Mac, these catalog files reside in the user’s Pictures > Lightroom folder, and are accessible from within Lightroom.
However, this means having to open Lightroom in order to open whichever catalog you’re looking for, or to go each time to the folder in question on your hard drive.
One solution to this is to create shortcuts to the catalogs themselves, and have them nested on your dock or on your desktop. It’s a small hack, but it does help if you’re constantly swapping between catalogs.


Recent Comments