


Few things drain a photographer's time like scheduling. The endless back and forth of proposing times, waiting for replies, and reworking your calendar when a client cannot make it adds up to hours every week. Online booking solves this by letting clients see your availability and choose a time themselves, all without a single scheduling email.
This guide walks through how to set up online booking in Iris Works so your calendar fills itself while you focus on photography. Once it is running, you will wonder how you ever managed scheduling any other way.
Why Online Booking Changes Everything
Online booking does more than save time. It also helps you book more clients. When a potential client is excited and ready to schedule, any delay gives them a chance to hesitate or book with another photographer. A booking link lets them commit in the moment, while their enthusiasm is high.
It also makes your business look professional and modern. Clients increasingly expect to be able to book services online the same way they book restaurants or appointments. Meeting that expectation signals that you run an organized, contemporary business.
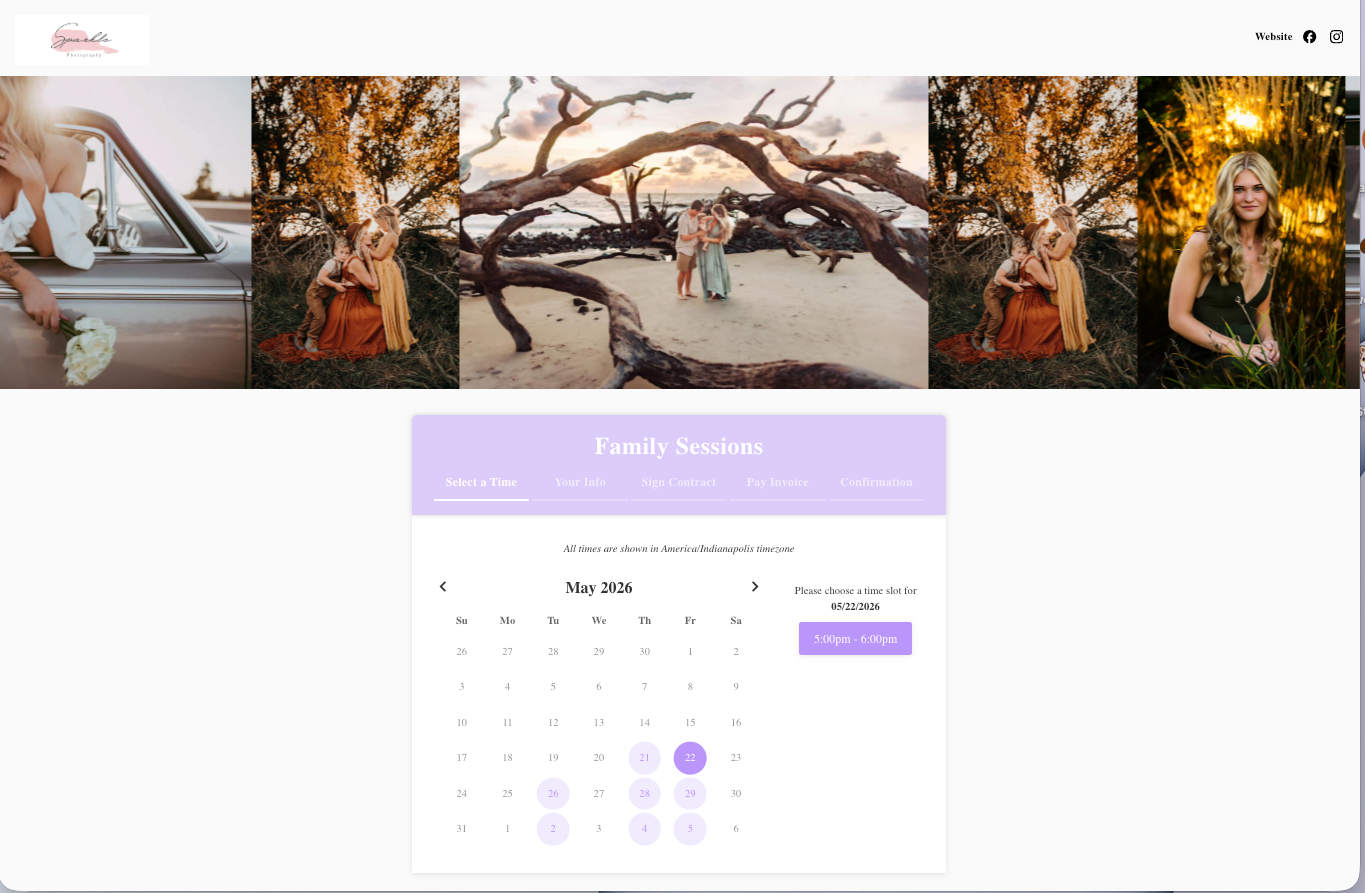
Step 1: Connect Your Calendar First
Before setting up booking, make sure your calendar is connected to Iris Works. This is essential, because online booking relies on knowing your real availability. When your calendar is synced, the system automatically hides any times you are already busy, which prevents double bookings.
Take a moment to confirm that all of your existing commitments, both professional and personal, are reflected in the connected calendar so your booking availability is accurate from the start.
Step 2: Define Your Session Types
Next, set up the types of sessions clients can book. Each session type can have its own name, description, duration, and price. You might offer a family session, a newborn session, a branding session, and a mini session, each configured separately.
Clear session types help clients choose the right option and ensure the correct amount of time is blocked on your calendar. Include a short description for each so clients understand exactly what they are booking.
Step 3: Set Your Availability
Decide when you actually want to take sessions and set those windows in Iris Works. You might only shoot on weekends, or only during golden hour on weekday evenings. By defining your availability precisely, you ensure clients can only book times that genuinely work for you and your ideal shooting light.
This step is where you protect your work life balance. Blocking off the times you want to keep free means online booking works for your life rather than filling every open hour.
Step 4: Add Booking Requirements
Strengthen your booking process by attaching requirements to it. You can require a contract to be signed and a deposit or full payment to be collected at the time of booking. This means that by the time a session appears on your calendar, it is already secured with a signed agreement and payment.
Setting these requirements protects your business and eliminates the awkward step of chasing paperwork after the fact. The booking is complete and professional from the very first click.
Step 5: Customize the Booking Experience
Make the booking page feel like your brand. Add your logo, colors, and a warm, welcoming description. You can also include a questionnaire to gather the details you need, such as the number of people in the session or the client's vision for the shoot.
A branded, thoughtful booking experience reinforces your professionalism and starts the client relationship on the right note before you have even spoken.
Step 6: Share Your Booking Link
Once your booking page is ready, share it everywhere your clients find you. Add it to your website, your social media profiles, your email signature, and your automated inquiry responses. The easier it is for clients to reach your booking link, the more sessions you will book.
Many photographers include the link directly in their inquiry response template, so an interested lead can book immediately without waiting for another message.
Step 7: Let Automation Take Over
The real magic happens after a client books. You can connect your booking to a workflow so that the moment a session is scheduled, the client receives a confirmation, your prep sequence begins, and reminders are queued automatically. From booking to session day, the entire experience runs on its own.
This connection between booking and workflow is what turns online booking from a convenience into a complete, hands off client onboarding system.
Getting the Most From Online Booking
To make online booking as effective as possible, keep your session types current, review your availability regularly, and refresh your booking page copy so it always reflects your current offerings and pricing. A little maintenance keeps the system working smoothly all year.
The payoff is significant. Photographers who embrace online booking consistently report reclaiming hours of administrative time each week and booking clients they might otherwise have lost to delay. It is one of the highest impact systems you can put in place.
Common Online Booking Mistakes to Avoid
A few missteps can undermine an otherwise great booking system. The most common is failing to keep your availability current. If your calendar is not synced or your blocked times are out of date, clients may book slots that do not actually work, creating awkward cancellations. Make it a habit to keep your calendar accurate so your booking page always reflects reality.
Another frequent mistake is offering too many session types or options, which overwhelms clients and leads to hesitation. Keep your booking page clean and focused, presenting only the sessions you genuinely want to book. Clarity converts better than an overwhelming menu of choices.
Photographers also sometimes forget to promote their booking link. A booking page only works if clients can find it, so place it everywhere they encounter you. Finally, do not neglect the confirmation and follow up experience. A booking that is not immediately confirmed leaves clients uncertain, so always connect your booking to an automated confirmation so clients know their session is secured the moment they book.

How Online Booking Grows Your Business
Beyond saving time, online booking has a direct effect on how many clients you book. Every hour of the day and night, your booking page is working for you, ready to capture a client the moment they decide to commit. A prospect who visits your site at ten at night can book on the spot rather than sending an email and potentially cooling off by morning. This around the clock availability quietly increases your bookings without any extra effort.
Online booking also improves the quality of your leads. Because the process filters clients toward your defined session types, availability, and requirements, the people who book are already aligned with what you offer. You spend less time on mismatched inquiries and more time serving clients who are a good fit. Over a full season, the combination of faster commitment, constant availability, and better qualified clients makes online booking one of the most effective growth tools a photographer can adopt.
Frequently Asked Questions
How does online booking in Iris Works save me time?
Online booking in Iris Works lets clients view your availability and choose a time themselves, which removes the back and forth of scheduling emails. Your calendar fills automatically while you focus on photography instead of coordinating times.
Can Iris Works prevent double bookings when clients schedule themselves?
Yes. When your calendar is connected to Iris Works, the system automatically hides times you are already busy, so clients can only book genuinely open slots and double bookings are prevented.
Can Iris Works require a contract and payment at the time of booking?
Yes. Iris Works lets you attach requirements to booking, so a client can sign the contract and pay a deposit or full amount as they schedule. By the time the session hits your calendar, it is already secured.
How does Iris Works connect online booking to my client communication?
In Iris Works, you can link booking to a workflow so that the moment a client books, they receive a confirmation and enter your automated prep and reminder sequence. The entire onboarding runs on its own from booking to session day.
Recent posts